Beginners Landscape Photography Guide for Stunning PhotosLandscape photography tips for all levels of photographer to help you get your very best photos when capturing the outdoors.
This article is part of a series of articles. Please use the links below to navigate between the articles.
- Introduction to Photography Course - Definition & Types of Photography
- How Cameras Work and Terminology Explained for Beginners
- What is the Exposure Triangle and How Does It Affects Exposure?
- Understanding Camera Shutter Speed for Beginners
- Aperture and Depth of Field in Photography Explained
- What is Digital Photography ISO and Grain?
- How to Understand Camera Lenses and Focal Length
- Essential Photography Composition Rules To Improve Your Photos
- Camera Metering Modes Demystified - Which One To Use
- Camera Shooting and Exposure Modes Explained
- Complete Guide to Flash Photography for Beginners
- When and How To Use A Camera Tripod In Photography
- What Are White Balance And Colour Temperature Camera Settings?
- How to Use Camera Histograms in Photography for Perfect Exposure
- Master These 10 Camera Settings For Your Best Photographs
- Why You Should Be Shooting in RAW - Reasons and Benefits Explained
- Essential Photo Editing Techniques to Enhance Photographs
- Complete Guide to Macro Photography for Beginners
- Beginners Landscape Photography Guide for Stunning Photos
Being a landscape photographer would possibly appear to be one of the simplest ways to make a wage, experiencing the peace of daybreak, for example, however, it's not as straightforward as a non-photographer would assume. There are frequently logistical problems and technical challenges and from time to time the creative thought process can also be overwhelming.
Landscape Photography Location Preparation
As with all tasks, preparation is the important thing to getting the best landscape photographs.

You should familiarise yourself with the location you are planning to shoot well in advance. It's very helpful, if not necessary, to visit a location before you are to shoot. This will help you in finding the best angles and viewpoints and will prepare you for when time is of the essence. If you are planning a nightscape landscape, visiting the site beforehand may well help prevent you from getting lost when it's dark. Consulting an Ordnance Survey or terrain map for your chosen location will help you to fully appreciate the photographic possibilities that the location has to offer.
Plan your journey so you understand precisely where to go, how long it takes and that you've got sufficient fuel. This means you will not waste an early morning trip by missing a daybreak. If you want fuel, fill up the day before to prevent any needless delays. You never know if your fuel station might be closed or have run out of fuel in the morning.
If you are shooting near the coast, familiarise yourself with the tide times. This isn't just important for figuring out what subjects online the coastline shall be visible to photograph but in addition essential from a safety point of view.
Check websites similar to TimeAndDate for correct daybreak and sundown times for the area you're visiting, and keep in mind that the times change marginally daily. It's additionally worth researching the placement of first light and sunset because it changes dramatically through the year. in midsummer, the sun rises to the Northeast, while in mid-winter it rises in the Southeast.
Knowing the weather forecast will allow you to decide which location to photograph, or even venture out at all. For the most accurate forecast, take a look at the weather as close to your departure as possible.
Get up early. It may sound cliche, however, daybreak is the best time of the day. There are few, if any, other people around and the gorgeous light and magical sense of freshness lend a hand to make this the very best time for landscape photography.
To appreciate your landscape photography, you must wear the appropriate clothing to feel comfy. Take warm clothes, hats, gloves, walking boots or wellies when photographing close to water.
Equipment for Landscape Photography
You should have the appropriate apparatus and understand how to make use of it correctly.
A sturdy tripod is nearly always an essential item. Take it everywhere and use it always. Using a tripod had many advantages to stability, however, it also slows down your picture-taking and leaves two hands free to use your filters. A remote shutter release is also an essential piece of kit as it serves two purposes. Firstly, it allows long exposures over 30 seconds using bulb mode, and also it prevents camera shake which will occur when you press the shutter button. It's also a good idea to mirror the lockup function to further reduce vibration when pressing the shutter.
The photography histogram function on your camera allows you to quickly check for over and underexposure. Reviewing photos on the camera screen also provides reassurance in the field, it allows you to correct any off angles, check composition and allows you to retake images while you are still on location.
If your camera or tripod does not have a built-in spirit level or artificial horizon, you can get spirit levels which attach to the cameras hot shoe. Spirit levels allow you to make certain that your horizons stay level in every shot.
Telephoto lenses can be used to compress background layers in long-distance landscapes. They are ideal for shooting from hilltops or when you are deep inside the woods.
Wide-angle lenses are great for capturing dramatic landscapes with strong foreground elements and dramatic skies.
Graduated filters are vital for correctly exposed photographs in difficult lighting conditions, such as when photographing bright skies above darker foregrounds in low light. Neutral density filters is used when you need to take longer exposures in bright light. Polarising filters boost the blue of the sky, saturate colours and cut through reflections on the water.
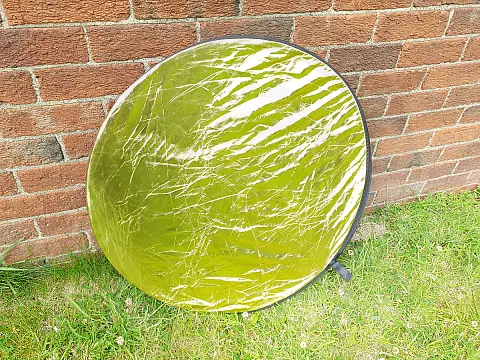
Reflectors can be good when photographing close-up landscapes such as in a forest. You can use a reflector to reflect light onto your subject and fill in harsh shadows. You can also use a reflector to adjust the colour temperature of a photo. A gold reflector will introduce warmth into your subject, while a white or silver will make the photo colder. You can also use translucent reflectors to diffuse the light if you find it's too strong on your subject.
Landscape Photography Camera Settings
Aim to use full manual mode, or at least aperture priority modes. These take exposure control away from the camera which can often struggle with the challenging lighting conditions of landscape photography. Using one of these modes is a fundamental factor in taking good landscape pictures.
For the majority of landscape photographs, you will want to be using a small aperture, f/16 for example, to maximise depth of field in the picture. Use as low an ISO as you can to cut down on unwanted noise and shoot with a long exposure. This is often a by-product of the small aperture and low light, a relationship known as the exposure triangle.
If you're not comfortable with full manual mode, most cameras have a landscape scene mode. This mode will usually boost the saturation of greens and blues for you as they are the primary colours of landscapes. It will also take control of white balance and exposure, and it will attempt to set a low sensitivity setting and narrow aperture so that shots have lots of sharp details.
If you want to control exposure yourself, aperture priority mode can be a better choice than the full manual. You can still boost greens and blues by using the landscape option of the picture styles on Canon cameras and Picture Control settings on Nikon cameras.
Shooting in RAW is essential as it will give you greater control over the post-processing of your photographs without compromising on quality. When shooting in RAW you can also adjust the white balance more accurately in the post-processing stage and get the perfect colour balance.
Landscape Photography Composition Tips
One of the trickiest parts of landscape photography is that of composing a harmonious and balanced scene. Great landscape photography can take many years of trial, error, and scrutiny to perfect. The best landscape photographers often transform the ordinary into the beautiful by adhering to simple rules of perfect conditions and refined composition. There are several composition rules, but don't be afraid to break them!

The rule of thirds gives balance and harmony to photographs. For landscape photography, it can be beneficial to break this rule and go for symmetry. Reflections in lakes are the prime example of when breaking the rule is good. Place the water line in the centre of the photo for a balanced photograph.

The best photographs feature simple, pleasing compositions. Don't overcrowd your composition trying to squeeze everything in. Look for objects that you can exclude without compromising the harmony of the result.
Look for the three key elements of detail, texture, and form. Cracks and geographical faults, a sea of swaying wheat in a summer field, texture and shape are essential in landscape photography. A winding river, repeating shapes or jagged rock teeth can all improve a photo. The complete lack of features can also be just as appealing in the right context.

Natural light can be extraordinarily challenging at times. The most perfect light usually only lasts a few moments before fading away. The best times of day to shoot are usually the so-called "golden hours", just before sunset and just after sunrise when the sun is low on the horizon and the light is warm. Patience and persistence are the most important aspect of photographing landscapes in the golden hours, so make sure you are set up and ready to wait for these brief moments.
Look for favourable foreground elements and do not settle for anything less than perfect. Seek something different and appealing. This may be through colour, subject, shape, or something else. An ideal foreground grabs attention for the right reasons and draws the viewer into the rest of the photo. You should also look for the lead in lines, such as rivers or roads, which will draw the viewer into your photo and lead their eye towards a subject.
Wide-angle lenses can create the greatest emotional reaction when used successfully. Wide focal lengths, like 17mm or 24mm, can sweep the eye through the frame from fascinating foreground rocks too far away clouds, giving a sense of large dynamics and is close to how we naturally process the world around us.
Post Processing Landscape Photography Photos
Post-processing in programs like Adobe Lightroom should be no substitute for good photography in the field. Unless your images are from a once in a lifetime moment, it is much better to re-shoot them rather than trying to rescue a poor image with extensive processing.
That being said, there are a few times when delicate post-processing can be advisable.
Digital camera sensors can attract dust which shows up on photos as dark spots. These are more visible when using smaller apertures. As part of your post-processing workflow, you should review every inch of the photo at 100% and use the clone stamp or spot healing tools to remove dust spots.
Above all, follow your passions and shoot topics you're enthusiastic about. This will shine through in your photographs.


