Top 20 Pro Photography Tips To Get Your Best Photos in 2024Photography tips and secrets collection to help you take amazing photos. Learn the secret photography tips the pros don't want you to know!
Move in Closer To Your Subject
Practically all shots can be improved if you take a few steps closer to your subject. By filling the frame with your subject you reduce the amount of clutter in the image and fewer distractions to draw your eye away from your subject. if you can't move closer, try using the zoom of your camera to get a close-up shot.
When taking shots of family and friends, most people place the subject's full body in the frame or place their head and arms in the shot. Instead, fill the frame with your subject's FACE only - particularly if they are smiling or are in a moment of reflection.
Use Optical Rather than Digital Zoom

Cameras are marketed with both optical zoom and digital zoom capability. Optical zoom features an array of lenses which adjust the light entering the sensor. Digital zoom works in software to enlarge the image.
Optical zoom is the highest quality and clarity as all the sensor is used to create a full-size image, whereas digital zoom suffers a loss of quality as a smaller portion of the sensor is used and the image is then enlarged.
Higher quality and clarity mean the larger the photo can be printed or displayed without looking fuzzy or blocky. As a rule, you should avoid digital zoom.
Place Your Subject Off-Center
There are various photography composition techniques that you can use, however, the most basic one is to place your subject off-centre and ensure something interesting is in the background that fills the remainder of the image.
Photographing Children
Children make a wonderful subject. Here are some tips for ensuring photos of children are even more memorable.
Bring yourself down to the child's level, even if you need to crouch down. This will give your shots a kid's eye view and won't distort their image like taking the shot from above will. While posed shots are great, you can quite often get better results by capturing an image when their thoughts are preoccupied with something else, for example, while they are at play.
Take More Photos, And Delete Your Shots
The ability to delete your photos is one of the major advantages of a digital camera and you'd be mad not to use this to the fullest extent. I've taken hundreds of photos in a single day using burst mode to capture the perfect shot.
This is also a huge tip when photographing groups. With such a large number of people, there always seems to be someone blinking or looking the other way. Having a large number of shots means you can pick the best of them to keep.
Preset your Exposure and Focus
When your camera is set to the auto setting, some cameras can take a while to adjust for exposure, white balance and focus. This is the 2-3 second delay between when you first press the shutter button, and the shot being taken.
If this happens with your camera, try presetting these by holding the shutter release halfway down to tell the camera to focus before you need to take the shot. Keep your finger held halfway down until you get the perfect shot, or use your camera's 'lock exposure' feature to keep the exposure settings locked until you find the right time to shoot.
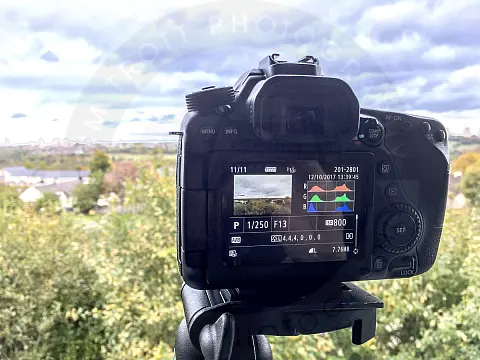
Use A Tripod For Stability and Sharp Focus
Tripods can be a hassle to carry around, but they do help you to take great shots in two ways.
First, the time you take to get out the tripod, set it up and position the camera on it will slow your picture-taking down. This means you'll become more aware of other elements like the composition of the image, and lighting. The more focused you are on external conditions, the more likely you will be to take a great shot.
The second advantage is your camera is more steady allowing you to take razor-sharp images - particularly in low light situations.
An alternative to the tripod is a 'monopod'. These only have one leg and don't have the stability of a tripod, but they have greater stability than just your hands - particularly if you lean them against something. If you do a lot of mountain walking, there are also extendable 'walking canes' that are great for helping you walk up steep hills. The top unscrews to reveal a tripod mount underneath turning it into a monopod.
Consider Unusual Angles
Most photos are traditionally shot at eye level as you used to need to have the viewfinder up to your eye to ensure you get everyone in the shot. Nowadays most cameras have an inbuilt LCD viewfinder screen so you don't need to hold the camera up at eye level. Try tilting the camera left or right to better position your subject in the frame. Try taking the photo from below, or above your subject. Try getting further away or closer. The main point is to move the camera away from eye level and experiment!
You can also try to lie on the ground and point your camera towards the sky for an interesting angle to shoot large monuments.
Using Flash During The Day
Using flash photography in bright sunlight sounds strange but it's effective. A flash helps to eliminate harsh shadows and also helps to emphasize your subject. It can also be used to add a sparkle to the eyes.
When you take pictures of subjects with a bright light behind them, for example, a backlit portrait, or a duck swimming in the water reflecting the sun, the camera will be fooled by the bright surroundings so the subject appears dark. By turning the flash on, you will fill in the shadow areas making the picture much more pleasing.
Nature photographers even use flash to ensure the nooks and crannies of flower petals are properly lit - to reduce shadows.
Professional photographers use Flash much more often than amateurs.
Use Continuous Shooting or Burst Mode
Most digital cameras have a continuous shooting or burst mode, where shots are taken one after the other in rapid succession. Using the continuous shooting mode you can take a sequence of shots and keep just the right one. Continuous Shooting also increases your chances of capturing a candid moment.
Give Yourself A Photography Theme
Sometimes you need to think creatively to find better shots, set yourself a theme to give your brain a head start. Make sure your theme is simple otherwise, you'll be more preoccupied with getting a shot in line with your theme than the image itself.
Examples of themes are:
- Something Old
- Fences
- Bright Colours
- Time
- Cliche
- Unfinished
- Repeating Patterns
- Desperation
- Bliss
Look For Light In Compositions
Different lighting can change the mood and feel of a shot, or be the difference between a mediocre and stunning shot. The light from the setting sun can produce wonderful lighting for a subject, as does sunlight through leaves. Maybe you see a shaft of light between two large objects such as buildings that can be a perfect backdrop for your subject.
Other options for different light sources at night can include:
- Neon lights make great nighttime subjects. You can silhouette your subjects in front of them, or use them as a subject themselves.
- Use a long exposure on a tripod to capture streaks of car lights on a road or highway or other moving lights like on a ferry.
Use Red-Eye Reduction Flash For People
Most newer cameras have two flash modes. Standard and Red-Eye Reduction. The Red Eye Reduction flash causes the camera to flash multiple times before taking the shot to get the subject's eyes used to the bright light.
Use this whenever taking photographs of people looking directly at the camera in low light. Many people don't realise they needed to use the red-eye flash until after they look at their photos after the event.
Remember to use red-eye reduction whenever taking photos in the following situations
- People looking directly at the camera
- Low Light
- Using your flash
Don't Rely On Flash Indoors
We've discussed using your flash a lot up to now, however, there are occasions where using a flash ruins the mood of the event you are photographing.
A flash tends to create a very harsh light and will ruin any natural mood. So, rather than using the flash whenever your camera tells you to, use available light whenever possible. In a dark situation, it's often better to use a tripod and open the shutter for longer to let in more light or turn on existing lights to illuminate the room than to use the flash.
In the daytime and when your subject is inside and near a window, have them face the light and position the camera between the window and your subject. This will allow the sunlight to light your image fully.
Use Different Lenses and Filters
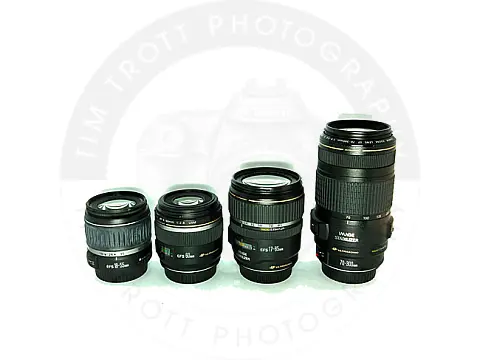
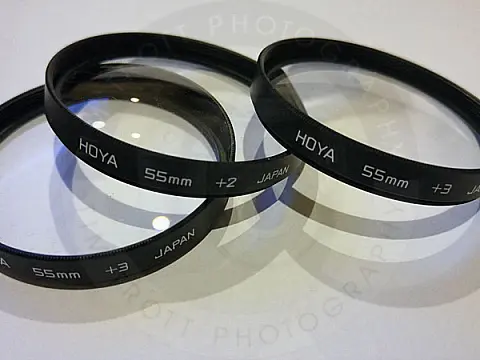
There are a wide variety of lenses and filters available to increase the range of options you have for shooting a photograph. Not all digital cameras can attach different lenses and filters. You should check the manual for your camera.
Some different lens types include
- Wide Angle
- Telephoto
- Fish Eye
Using a wide-angle lens is good for shooting an indoor room, or shooting vast landscapes. A telephoto lens can be useful when you need a close-up.
Some filters available include
- Polarizing
- Soft Focus
- Cooling/Warming
- Graduated
A polarizing filter can be the most useful filter to own. A Polarizing filter can deepen the colour and contrast in the sky, eliminate glare from water or reflective surfaces, or cut through the fog-like haze.
Soft Focus filters generate more diffused looks for romantic, moody, atmospheric, foggy or glowing effects in your shots.
Cooling filters add more blue to an image giving a psychological effect of calm or serenity in the final image. Warming filters cut out excess blue in an overcast sky to add more reddish tones to the image and make your photos look less harsh.
Finally, graduated lenses help for scenes that have a huge difference in light level - eg late in the day when the sky is still bright, but the foreground is in shadow.
Use Predefined Camera Modes
Most people don't know that many cameras now come with predefined shooting modes for taking shots. Eg Landscape, Cloudy Day, Full Sun, Indoors, Night.
Changing the mode of your camera to match your situation can result in better shots, as the camera has a better chance of selecting the shutter speed, flash and other exposure choices for a perfect picture.
Camera makers put a lot of thought into the settings for each of the different modes and tailor the settings to what will work well with their cameras. Don't be afraid to use the predefined scene modes of your camera.
Don't Add Camera Frills To Photos

Some manufacturers give you a feature that can imprint the current date and time onto your image. Or they offer to imprint other stats like the current exposure settings or shot number. Turn these off! You don't want anything to distract you or your viewer from the subject of your photo.
Modern digital cameras record the time and date the shot was taken anyway in a separate part of the image called metadata or EXIF.
Use The LCD Monitor to Preview Images
The LCD monitor will show you what your final image will look like. It won't be as large as your final image, but you will get enough of a feel for the image to know how your shot will turn out.
If your camera can show you a half-second freeze of your shot just after you have taken it, turn this feature on. The half-second will give you enough time to see if the image was well framed, and have the correct exposure or if you need to take another one. However the LCD uses a lot of battery, so be sure to head out with a full battery and/or spare batteries.
Look for Reflections
Water is a fantastic element to include in your photos, as the reflections it generates can make your image stand out. Keep a lookout for water around your environment when you shoot. Reflections from lights or splashes of colour can help with the ambience of an image. Rainy days are particularly good as puddles abound!
Photographing just the reflection and leaving the subject out is a great way to produce abstract images.
Clean your Camera Lens, Sensor and Body
If your images always turn out all blurry, it may mean your lens needs a clean. Most high-end cameras come with threads to which you can attach a SkyLight (or UV) filter. This helps to protect the lens from not only dirt but scratches. Cheaper cameras don't have threads so remember to cover the lens when not in use and try not to touch it.
To clean your lens, pick up a lens cleaning kit from your local photo store. Use the lens brush and air blower to remove any loose clinging particles. Place a drop of lens cleaning fluid onto some lens tissue (or a cloth) and wipe the lens clean with a circular motion. Use the blower to dry the lens, or let it dry naturally. Don't use any abrasive solution (such as soap) or wipe too hard on the lens as you can wipe away the special coatings.
Don't clean the lens too often - depending on how often you use your camera, every few weeks or a few months is fine. Watch out you don't create a 'worn spot' by cleaning your lens the same way each time. Alternate the circular motion with up and down or sideways movements sometimes.


