The Ultimate Portrait Photography Guide for BeginnersDiscover portrait photography with this beginner's guide. From lighting to posing, this guide will help you create stunning portraits.

If you're interested in portrait photography, this beginner's guide is a great place to start. This tutorial will teach you all you need to know about lighting, posing, and producing amazing photos, whether using a professional camera or your smartphone. You'll be able to make gorgeous and unforgettable portraits every time you use these helpful ideas and techniques.
Understand the Basics of Portrait Photography
Before going into portrait photography, it is important to learn the fundamentals. This includes instruction in lighting, composition, and posing. Because lighting is so crucial in creating the mood and ambience of a portrait, it is important to experiment with various lighting techniques and understand how they can improve or detract from your subject. Composition is also important in visually appealing pictures, so understanding the rule of thirds and other composition principles will significantly help you improve your photos. Positioning is important in capturing the personality and soul of your subject, so experimenting with different poses and understanding body language may make a big difference in your pictures. You'll be well on your way to capturing outstanding portrait shots if you grasp these fundamentals.
Choose the Right Lighting

Lighting is everything when it comes to portrait photography. Because lighting can make or break a photograph, selecting the best lighting setup for your subject and desired outcome is important. Natural light can provide a soft and appealing image, especially during golden hour or in shady settings. Artificial lighting, on the other hand, such as studio lights or off-camera flashes, can give you more control over the lighting and enable you to create dramatic effects. Experiment with various lighting settings and techniques to find what suits your style and the atmosphere you want to communicate in your photographs. Don't be afraid to experiment with shadows and highlights to add depth and complexity to your images.
Utilise Natural Light for Soft and Flattering Portraits

When you want to capture soft and attractive pictures, natural light can be a photographer's best friend. The objective is to select the best time of day and location to use the available natural light. The "golden hours" are sometimes called early morning and late afternoon because the light is warm, soft, and diffused. To generate a gorgeous glow on your subject's face, position them facing the light source, whether the sun or a window. Midday sunshine should be avoided since it might cast unattractive shadows and highlights. Experiment with various angles and placements to obtain the best lighting for your topic.
Use Reflectors and Diffusers to Control and Enhance Light

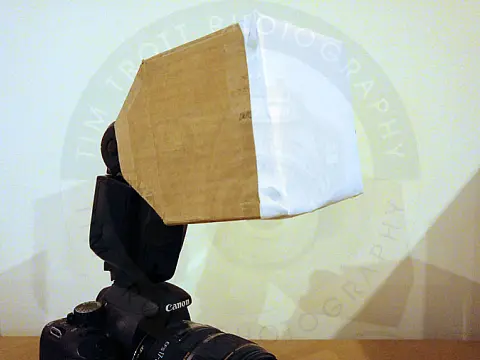
In portrait photography, reflectors and diffusers are key tools for managing and enhancing light. Reflectors bounce light back onto the subject, filling in shadows and achieving more uniform and balanced lighting. They are available in various sizes and colours, including silver, gold, and white, each generating a unique impact. In contrast, diffusers are intended to soften and diffuse strong light. They create a softer and more pleasing light by placing them between the light source and the subject. Diffusers can be composed of various materials, including fabric and translucent plastic. You can have more control over the lighting in your pictures by employing reflectors and diffusers, resulting in amazing and professional-looking images.
Experiment with Artificial Lighting for Creative Effects

While natural light is great for portraiture, don't be hesitant to experiment with artificial lighting to achieve unique and creative results. Artificial lighting gives you more control over the light's intensity, direction, and colour. You can utilise various lighting equipment such as strobes, softboxes, and reflectors to generate diverse effects. A softbox, for example, can produce soft and diffused light, whilst a coloured gel can give a splash of colour to your photographs. Don't hesitate to experiment with different lighting setups and techniques to give depth and character to your photographs.
Master the Three-Point Lighting Technique for Professional Results
The three-point lighting approach is a basic configuration in portrait photography to get professional results. Three light sources are used: the key light, the fill light, and the backlight.

The main light source is the key light, normally positioned at a 45-degree angle to the subject. It provides fundamental illumination and determines the subject's shape and form.
The fill light, normally located on the opposite side of the key light, fills in the shadows cast by the key light. It aids in the softening of shadows and the creation of more balanced lighting.
Backlighting, also known as hair or rim lighting, gives depth and distinction from the background. It helps to produce a halo effect around the subject and adds depth. You may produce professional and attractive portrait photography results by mastering the three-point lighting technique.

Find the Perfect Location
The location you choose for your portrait photography can significantly impact the overall look and feel of your images. It is important to pick a venue that complements your subject and desired aesthetic, whether you're shooting indoors or outside. Consider the surroundings, lighting, and any potential distractions in the location. Outdoor settings like a park, beach, or urban area can give a lovely natural backdrop. Indoor settings, such as a studio or a well-lit area in your house, can provide greater control over lighting and surroundings. Think outside the box and look for unusual venues representing your subject's personality or interests.
Determine the Style and Mood You Want to Achieve

Before you start looking for locations, you should decide on the style and mood you want to accomplish with your portrait photography. Do you want a natural outdoor look or a more dramatic studio vibe? Consider your subject's personality and interests as well. Limiting potential places that match your desired style and atmosphere will be easy once you have a clear image in mind. For example, look for locations with soft lighting and lovely natural surroundings to create a romantic, dreamy atmosphere. If you aim for a bold, edgy appearance, urban surroundings with fascinating architecture and graffiti would be better.
Research Potential Locations that Match Your Vision
Once you've decided on a concept for your portrait photography, it's time to start looking for prospective locations that fit that goal. Begin by searching for inspiration online through photographic websites, social media platforms, or a simple Google search. Look for photographs that capture the style and feel you want to achieve, and note where those images were taken.
You can also get ideas on amazing locations in your region from other photographers or local photography groups. They may have insider information on hidden gems or unique locations that might be ideal for your photographs.
Consider visiting potential locations to understand better what they have to offer. Take note of the lighting, the general environment, and potential obstacles or challenges. Visit potential places at various times of the day and examine how the light falls on the area. Take note of the direction and intensity of the light, as well as any potential shadows or strong highlights.
Ensure the location is easily accessible for you and your clients, especially if you carry equipment. Assess any potential hazards or obstacles that may affect the safety of your clients or equipment.
Look for Interesting Backgrounds and Natural Elements

When looking for the best locations for your portrait photography sessions, look for unique backgrounds and natural elements that can enhance your photographs. Such characteristics can give your portraits depth, substance, and visual intrigue.
Consider locations with distinctive architectural aspects, such as historic structures, bridges, or colourful walls. These make for interesting backdrops for your subjects and give character to your photos.
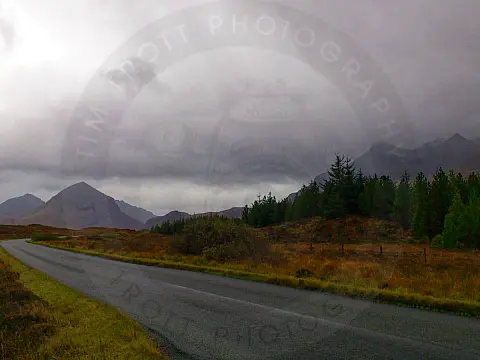
Natural components, such as parks, forests, or bodies of water, can also make for stunning photo backgrounds. Look for spots with rich foliage, vivid flowers, or tranquil lakes that can help your images have a peaceful and natural feel.
Direct and Pose Your Subject
Portrait photography requires you to guide and pose your subject. It is important to interact with your subject and make them feel at ease in front of the camera. Begin by clearly instructing them on how to pose, such as where to place their hands or how to position their bodies. You can also direct facial expressions and eye contact to achieve the appropriate mood or emotion. Remember to be patient and allow your subjects to relax and express themselves organically. Don't be afraid to experiment with various poses and perspectives to obtain the most flattering and interesting compositions. You can create captivating and dramatic photos by carefully directing and positioning your subject.
Understand the Basics of Body Language
Understanding the basics of body language is important when posing for portrait photography. Body language can convey various emotions and messages, so pay attention to how your subject's body is positioned and what it is communicating. Crossed arms, for example, can imply defensive behaviour or closed-off body language, but open and relaxed body language can show confidence and approachability. You can direct your subject to position in a way that enhances the overall atmosphere and message of the shot by paying attention to body language.
Use Natural and Relaxed Poses

It is important to establish a natural and calm atmosphere when posing for portrait photography. Stiff and forced poses might make your subject look unnatural and unhappy in the shot. Instead, urge the individual to relax and find a comfortable position for themselves. This can be accomplished by instructing them to sit or lean against support or recommending natural movements such as walking or interacting with their surroundings. You may make authentic and genuine photos by catching your subject in a natural and relaxed pose.
Experiment with Different Angles and Perspectives
Experiment with different angles and viewpoints to add diversity and interest to your portrait photography. Instead of photographing from eye level, get down low and shoot from a lower angle, or shoot from above for a different viewpoint. You may also experiment with different distances, coming close for a more intimate photo or moving back for a broader perspective. You may add depth and character to your portraits and produce visually appealing photographs by experimenting with different angles and viewpoints. Don't be hesitant to experiment with new angles and viewpoints to find the ones that work best for your subjects and the overall mood you want to communicate in your pictures.
Direct and Communicate with Your Subject
Communication is essential while posing for portrait photography. Directing your subject and articulating your goal clearly can significantly impact the outcome of your photographs. Establish rapport with your subject and make them feel at ease in front of the camera. Explain the poses and expressions you want them to try, and guide them gently during the process. Remember to provide positive feedback and encouragement to help them feel more confident. Not only can effective communication help you capture the right poses and expressions, but it will also create a collaborative and enjoyable experience for both you and your subject.
Edit and Enhance Your Portraits
Once your portraits have been captured, the next stage is to edit and enhance them to bring out their full potential. To adjust your photographs' exposure, contrast, and colours, use editing tools such as Adobe Lightroom or Photoshop. You can use the healing brush tool to eliminate flaws or imperfections on the subject's skin. You can also experiment with different filters and effects to add a personal touch to your photographs. However, it's crucial to remember not to over-edit and to keep the look natural. The idea is to improve your subjects' beauty while keeping them recognisable.