How to Capture Abstract Oil And Water PhotographyIn this simple tutorial, I will show you how to capture abstract reflections and patterns with oil and water photography.
Photographing with oil and water is a lovely and distinctive method to record the world around you. You can create magnificent abstract images that are guaranteed to wow your friends and family by combining two seemingly unrelated parts.

Equipment Needed and Setup
- Camera with macro setting or macro lens.
- A large tray or container to hold the water and oil.
- Olive oil and water.
- Spoon or pipet to place oil drops.
- Glass table or sheet of glass suspended between two chairs.
- Light source, studio strobe or lamp will do.
- Bright, vibrant backdrop.
You'll need a backdrop if you want a picture that is vibrant and colourful. Look for tea towels, posters, coloured wallpaper, magazines or cardboard paper. Anything spectacular will do. Even better, you can utilise your tablet's downloaded images as a backdrop for your oil and water photography. I've discovered that the better the material's colour, the stronger it is. The image has more depth and contrast as a result. Less reflective materials are those with dimmer tones, such as brown or black. For the greatest effects, try to use more vibrant colours.
A transparent glass layer must then be used to suspend your subject above the background. This will establish a suitable separation from the background and the background will be blurred. I was able to use a glass table to place my container on, and the background was placed on a chair underneath the glass.

Preparation is essential because working with oil can be messy. Always keep some old rags or paper towels on hand in case of spills. Apply the oil to the water in small, uniform dosages using a spoon or eyedropper.
A camera with a good macro setting is required, or if you have a DSLR a dedicated macro lens. You'll also need a tripod to keep the camera in position, freeing up your hands to fine-tune the oil in water. Set up your camera so the lens is near the glass and secure it to your tripod. As close as you can, align the front element with the glass surface. Focusing will be considerably simpler as a result.

Camera Settings for Oil And Water Photography
Turn on Live View Mode and then focus your camera on a region directly in front of the lens. You won't have to stoop over as much to monitor what is happening on the glass thanks to Live View Mode. Additionally, using Live View Mode will lessen the camera shake.

To ensure that the background object is not in focus and only the oil circles are, use manual mode and an aperture of about f/3.5. Your bubble macro photography should be OK with an ISO setting of 100 or 200. The lighting situation will affect the shutter speed.
Start Shooting Oil And Water Photography
Water should first be added to your glass dish. Use enough water; otherwise, your photograph will also show the dish's glass texture.

Apply a small amount of oil using your eyedropper or spoon to the water's surface directly beneath your camera lens. You are welcome to use any vegetable oil, including sunflower or olive oil. Just a few drops should be added to test how the oil and water mixture works. More oil may always be added, but it cannot be taken out. Add some dish soap and thoroughly combine if the oil droplets seem too large. The oil bubbles will become more bright and smaller.
Using a Template To Add Lighting Effects
Even something as straightforward as oil in water may be a fantastic subject for striking abstract art. A simple shape can be transformed into something much more artistic by placing a see-through template in front of a light since that shape is mirrored in each little ball of oil. If you have a laptop or tablet with a bright enough screen you can also capture the reflection of the screen in the oil.
Create a template by starting with a sheet of coloured film. Place your template at a downward angle in front of your light source. When not shooting, turn off the light and make sure it isn't too close to the bulb.
As shown, set up your light, tray, and template. Place your camera in opposition to the light. Concentrate on a certain area initially, then add extra oil to it to create droplet clusters. Choose the shutter speed and the desired aperture (f/8 is a good choice for the appropriate depth of field), then press the shutter.
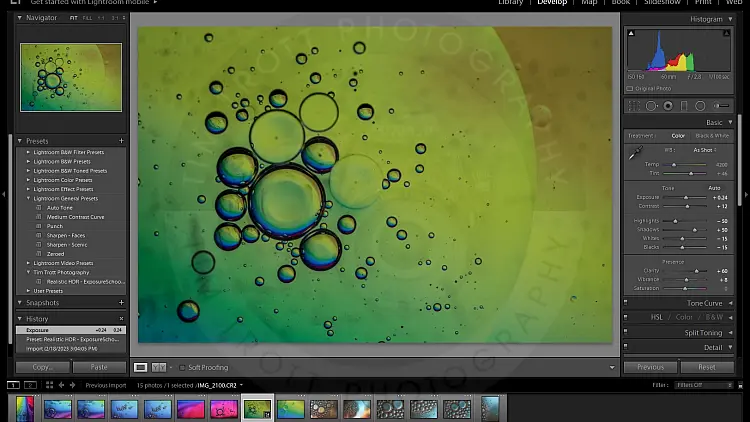
Post Processing the Results
Once the photographs have been downloaded to your computer, use Adobe Camera Raw or a comparable RAW processor and utilise the sliders to increase colour saturation, contrast, and the depth of the blacks. You might try using Photoshop to combine many frames.


