What Is HDR Photography and How Can I Take HDR Photos?HDR photography techniques show you how to shoot and process High Dynamic Range images in high-contrast scenes with detailed sky & shadows.
What is HDR Photography?
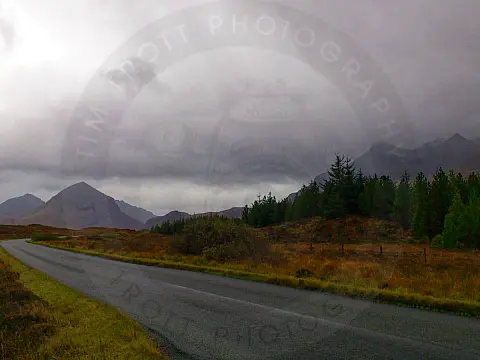
HDR stands for High Dynamic Range. Dynamic range is a measure of the range of different light levels, from the darkest black to the brightest white, that can be recorded or displayed by a device. It defines the amount of contrast you can capture without losing detail at the extremes. A good example of this would be something shot against a bright sky or landscape featuring direct sunlight and shaded areas. Normally you can expose the bright areas, and lose detail in the shadows, or vice versa.

HDR combines a couple of exposures which capture a frame for highlights, midtones and shadows. These are then merged to form one image maintaining the details of the shadows and highlights.
There are other strategies you can use to get the very best exposure such as the use of the flash or a graduated filter. The HDR method is the easiest.
HDR photographs can be captured on any camera, although some cameras (and mobile phone) have the ability inbuilt. In all cases, they generally take 3 exposures (frames) in quick succession and merge them leaving you with one HDR photo. Some cameras have different preset effects for HDR such as vivid, bold and embossed.


If your camera does not have an HDR feature don't fret. This guide will show you how to achieve this effect with a little bit of manual effort.
How to take HDR Photography Frames?
Essentially, the process is the same as that used for exposure bracketing. You can use the bracketing feature if you have it to aid in capturing the frames. Use the auto-exposure bracketing set to around 1 stop on either side. This is a starting point, you may have to increase the number of stops depending on the scene brightness.
Because we are taking multiple photographs one after the other, these techniques can only be used on stationary subjects. Even a breeze in the trees can create ghosting which can spoil the effect.
The basic idea is to set the lens focus manually, use a tripod, and set the exposure to aperture priority so the depth of field remains constant. Set the camera to the fastest continuous drive setting available and take around 3 photos using exposure bracketing. We then use software to stack these images into one HDR photograph.
HDR Photography Step by Step
Shooting HDR photography isn't as difficult as it sounds. All you need to do is take a series of pictures through bracketing at different exposures, from underexposed to overexposed. How many photographs you wish to have and the variation in exposure between shots should largely depend on what you're photographing.
Here's the way to make a high dynamic range image.
Step 1 - Keep the Camera Steady with a Tripod
As you'll be combining a couple of shots to make your final HDR photograph, the composition needs to be the same in each frame you take. This means a sturdy tripod is vital. You'll also want to take steps to steer clear of any camera movement between shots, so use a cable release so you do not have to touch the camera throughout the process.

Step 2 - Camera Settings
Your aperture has to stay consistent during the sequence, otherwise, the depth of field will change between shots and this will make aligning them more of a problem. Switch your camera to aperture-priority mode. Now the camera will vary the exposure by changing only the shutter speed.
In most cases, three to five images with a one- or two-stop difference between one shot and the next is enough for constructing an HDR image, but if the scene has an excessively wide brightness range you may need to shoot five or seven frames. Most HDR processing software can process CR2 or NEF files, so set image quality to RAW format for the best results.
Step 3 - Enable Auto Bracketing
Activate your camera's auto-bracket feature. This will calculate and adjust the exposures in your sequence. There are usually two settings. One is the number of shots with three being the normal number, however, some cameras let you shoot five. The second setting is the exposure interval between the shots. This can be 1EV, 2EV or, on some cameras, 3EV.
Now when you press the shutter release button it will take a normally exposed photo, the next time you press the button it will take an underexposed picture and the third time you press it will take an overexposed photo.
Take some test shots before starting. The longest exposure should show detail in the darkest areas, such as the shadows, while the shortest exposure should show detail in the brightest ones, such as the sky. Use the camera's histogram function to assess exposure.


Step 4 - Blend your Shots using Adobe Lightroom
Once you have a series of exposures you need to blend or merge them using image editing software. Adobe Lightroom has a very good, and easy, HDR merge tool. Other software applications perform the same effect in a similar process.
From Lightroom, Select Photo > Photo Merge > HDR. In the HDR Merge Preview dialogue, deselect the Auto Align and Auto Tone options, if necessary. You can preview the effect of these settings right within the dialogue box. Click Merge to create the HDR image. More instructions on the merge process are on the Adobe website .