Master These 10 Camera Settings For Your Best PhotographsLearn about the key camera settings and how to use them to control exposure, shutter speed, use the flash and get your best shots.
This article is part of a series of articles. Please use the links below to navigate between the articles.
- Introduction to Photography Course - Definition & Types of Photography
- How Cameras Work and Terminology Explained for Beginners
- What is the Exposure Triangle and How Does It Affects Exposure?
- Understanding Camera Shutter Speed for Beginners
- Aperture and Depth of Field in Photography Explained
- What is Digital Photography ISO and Grain?
- How to Understand Camera Lenses and Focal Length
- Essential Photography Composition Rules To Improve Your Photos
- Camera Metering Modes Demystified - Which One To Use
- Camera Shooting and Exposure Modes Explained
- Complete Guide to Flash Photography for Beginners
- The Importance of Using Tripods in Photography
- What Are White Balance And Colour Temperature Camera Settings?
- How to Use Camera Histograms in Photography for Perfect Exposure
- Master These 10 Camera Settings For Your Best Photographs
- Why You Should Be Shooting in RAW - Reasons and Benefits Explained
- Essential Photo Editing Techniques to Enhance Photographs
- Complete Guide to Macro Photography for Beginners
- Beginners Landscape Photography Guide for Stunning Photos

The camera settings tips below are written using a Canon DSLR. However, they are all perfectly valid for other makes and camera types. The menu options may be in a different place, or the button may have a different icon, so you may have to check your manual. However, the overall principle is the same for every camera.
It is important to configure your camera with the base settings that work for you, so here are some of the basic camera settings that will help you get the best possible shot.
Maximise Photo Quality Camera Settings

When it comes to file format, shoot in RAW rather than JPEG. The extra data that is collected in the uncompressed RAW format gives you more flexibility to adjust your shots post-shoot if necessary. Keep the ISO as low as possible to reduce unwanted noise, and set the white balance to auto. For the most part, auto-white balance makes a good decision, and as you get more confident, you can change it yourself later on.
Master Exposure Settings
Reduce the time you spend trying to rescue under and overexposed images in Photoshop by getting it right the first time, in camera.
Getting your head around exposure can be daunting, so start with the basics. When taking photographs, an image is recorded by light reaching your camera's sensor. You need a certain amount of light to expose the scene correctly; too little will cause the image to be too dark or underexposed. Too much light will make it too bright or overexposed. The trick is getting this just right.
The amount of light reaching your sensor is controlled by three key components - aperture, shutter speed and ISO. These three form the exposure triangle.
The aperture controls how much light enters the lens; the wider the aperture, the more light can enter. The shutter speed determines how long the camera sensor is exposed to the light, and the ISO determines how sensitive the sensor is to the light.

SLRs offer a range of exposure modes, from fully automatic to fully manual. Between these two extremes are the semi-automatic modes, aperture and shutter priority, which provide lots of control. Aperture priority allows you to set the aperture, and the camera will work out at the best shutter speed. Likewise, setting the shutter priority mode allows you to set the speed, and the camera will adjust the aperture accordingly. Which mode you need will depend on what you are photographing.
Aperture and shutter speed affect the amount of light you let into the lens and how the images look. The aperture determines the depth of field, which is the amount of the scene in focus. If you want a blurred background, you need a wide aperture, such as f/2.8, and if you want everything in focus, from front to back, you need a small aperture, such as f/22. The shutter speed controls whether a moving subject is frozen or blurred; the slower the shutter, the more motion is captured.
Aperture Control Settings
Set the right combination of aperture and shutter speed, and you'll notice an immediate difference in your photography.
The aperture is simply the hole in the front of the lens through which light enters. A diaphragm can be made larger or smaller to control how much light reaches the sensor. The aperture size is measured in f-stops and is fractions, with f/4 being twice as large and f/8, which is twice as large as f/16. Lens apertures are typically in the range of f/4 to f/22. Each f-stop halves the amount of light reaching the sensor, which can be compensated by doubling the exposure time.
The depth of field measures how much of the photo is in focus, both in front and behind, the point you've focused on. Wide apertures of f/2.8 will produce an image with a very shallow depth of field, which is great for macro and portraits, while narrow apertures, like f/22, will maximise depth of field and are ideal for landscape photography.
Shutter Speed Settings Explained
You can control the way that movement is captured in your photos by getting to grips with your camera's full range of shutter speeds. Like the aperture setting, your shutter speed isn't simply controlling the overall exposure. It also has a visible effect on your shots, enabling you to control the appearance of a moving subject.
Fast shutter speeds to freeze movement, ensuring pin-sharp pictures no matter how unsteady your grip on the camera or how fast your subject is moving. Slow shutter speeds tend to blue movement and can be used for creative effects.
Shutter speeds are measured in seconds or fractions of seconds. 1/10 is one-tenth of a second, 1/250 is one two-hundred and fiftieth of a second.
If you're shooting handheld, you'll need a shutter speed that is fast enough to ensure that the camera shake doesn't cause blurred shots. Generally, you need to use a shutter speed greater than the focal length. For example, if you shoot with a 200mm lens, your shutter speed should be 1/250 sec or faster.
Reduce Noise with ISO Settings and Noise Reduction
ISO is a computed amplification of a digital signal. As with its film counterpart, digital ISO increases the sensitivity to light at the expense of quality. High ISO film suffers from graininess, while digital ISO suffers from noise during amplification. For this reason, you should always strive to use the lowest possible ISO value. If there is not enough light and your pictures are blurry because the shutter speed isn't fast enough, and you're already using the widest possible aperture, the only thing left to do is to increase the ISO or use a flash.
Target ISO values for the outdoors will range from ISO 100-400 and indoors ISO 400-3200. Please note that these values will vary slightly depending on the ambient light in the situation and your camera. Digital camera sensors are constantly improving, but as a guide, anything above ISO 1600 will show noticeable noise.
Choose the Right Metering Mode
To determine the aperture and shutter speed required to expose a shot correctly at a given ISO, your camera measures the amount of light reflected from a scene using a built-in light meter. The problem is that the camera does not know what you are photographing, so it assumes that the scene contains a full range of tones and tries to expose it accordingly. There are, however, certain lighting conditions which confuse the camera.

Dark Scenes
A built-in light meter will produce an even exposure of average midtones. A dark scene that's been exposed so midtones dominate it will look overexposed.

Midtone Scenes
Scenes containing a relatively even mix of shadows, midtones and highlights won't trouble your camera's metering system.

Bright Scenes
As with dark scenes, because the built-in light meter will try to render any scene as an average midtone, very bright subjects like snow will look grey rather than pure white.

Metering options depend on the camera, but generally, there are evaluative, centre-weighted and spot. Evaluative metering takes a reading from the entire scene and uses an average to determine the exposure. Centre-weighted looks at the central 60% of the frame to take the average, while spot metering takes a single reading from the selected autofocus point. Evaluative metering is useful when photographing landscapes when you need the entire scene well exposed. Centre-weighted is useful for portrait photography when the background isn't as important as the subject.
I usually stay with evaluative metering. I usually either set the exposure myself (using M-mode) or let the camera decide on the ISO, and on the rare occasion that the metering is off, I simply dial in some compensation.
Chose the Best Focus and Drive Mode Settings
Focus and drive settings are often overlooked but essential for coping with challenging situations.

Take Control of AF Point Selection
When you look through your viewfinder and half-press the shutter, you will see multiple autofocus points flash when they have achieved focus, and you may hear a beep. These are cues designed to help you take pin-sharp photos. However, if you shoot using basic modes (auto, portrait, sports, landscape, etc), the camera will select the autofocus points automatically based on what it thinks you are taking a photo of. This is usually the closest, but this may not always be true.
You can manually set the focus points to a region or a specific point. This means you can focus on one of your subject's eyes when shooting portraits, for example, even if it's off-centre in the frame.
In general, single-point AF is best used when shooting stationary subjects. It allows you to fine-tune the autofocus point manually. The centre AF point is always the most accurate. Dynamic-area AF is great for shooting fast-moving subjects. Some camera allows you to select a group of AF points to help provide a compromise between the speed of a single point and the flexibility of dynamic area.
Use The Most Appropriate Drive Mode

To ensure you capture the shot at the precise time, SLRs offer several drive modes. The two main settings are single shots for stationary subjects and servo drives for moving subjects. Some also offer a hybrid "AI Servo" mode, a compromise between the two.
The camera's Drive Mode allows you to select whether a single image is taken when you press the shutter or a burst of photos. You can also use the timer to control the delay between pressing the shutter and taking the picture.
You should select the drive mode that applies to what you are shooting. If you are using the single shot mode for a moving subject, chances are by the time the lens has focused and you've pressed the button, the subject has moved out of focus. Similarly, using servo focus on a stationary subject may cause focus issues as the servo is constantly running, trying to lock focus.
Camera Lens Choice
One of the main benefits of having an SLR is the ability to change lenses. Most of us start with kit lenses, which are cheap everyday lenses bundled with the camera to get you started. The key here is that they get you started. There will come a time when you want to add to your creative equipment, and expanding your collection of lenses is a great place to start. Here are the main points to consider when choosing a lens.

Lens Crop Factor
The size of your SLR sensor affects the angle of view of your lens. The smaller the sensor, the longer the effective focal length. A full-frame sensor has the same physical dimensions as a frame of 25mm film. Smaller APS-C sensors, used in most mid-range SLRs, capture a smaller proportion of the image projected by the lens. Depending on the manufacturer, this increases the focal length by a factor of 1.5x or 1.6x.
Camera Lens Speed
We're not talking about focus speed but the lens's light-gathering ability. Fast lenses have a wide maximum aperture, such as f/1.4. They let in more light, which allows you to use faster shutter speeds. The downside is that they are often heavier and more expensive.
Another factor determining the cost of a zoom lens is whether it maintains the same maximum aperture throughout the zoom range or if it gets smaller as you zoom in.
Lens speed is given as a range, typically written as f3.5-5.6; at the widest zoom, the widest aperture is f/3.5, and at the maximum zoom, the widest aperture is f/5.6.
Camera and Lens Image Stabilisation Settings
Some lenses have image stabilisation (IS) features in which servo motors create a gyroscopic effect to counter camera shake when using the camera handheld. This allows you to use a longer shutter speed without introducing motion blur caused by the camera shake. Image stabilisation usually gives you a 3-4 stop improvement. A four-step improvement means that shooting with a shutter speed of 1/15th of a second with image stabilisation gives the same image sharpness as shooting at 1/250th without image stabilisation.
Some image stabilisation lenses can operate in two or three modes. You should select the mode that best suits your subject, or the stabilisation will be ineffective or worsen things.
- Mode 1 - Corrects vibrations in all directions. It is mainly effective for shooting still subjects.
- Mode 2 - Corrects vertical OR horizontal camera shakes during panning depending on the camera's orientation.
- Mode 3 - Same as Mode 2, but only stabilises during exposure. The other two modes are constantly stabilised. Panning with stabilisation on can be tricky.
If you are using a tripod, image stabilisation should be turned off, as the servos will generate vibration that is not countered by the camera's movement.
Use the Right Camera Memory Card
There are hundreds of different memory cards on the market, all with many features to consider. The main memory card formats are SD Card, CompactFlash, MMC, M2 and many more. Each type has several specifications you need to consider when buying a new memory card. Price and capacity are the features most people look at first, but not all memory cards are created equal.
I will look at SD Cards here as they are the most common today. Similar features and terminology apply to the other types. If in doubt, consult your camera manual for the type and specification to use.
The obvious property to start with is capacity. You should NOT select the highest capacity you can find. Instead, look to one that provides enough for what you are likely to shoot and provides some capacity for spare. Investing in 3-4 smaller cards is better than one large card. That way, you won't lose all your photos if a card gets corrupted, damaged, lost, or stolen.
The number of photos you can get on the card depends on the format you are shooting in and the number of megapixels your camera has. JPEG files are smaller than RAW, and the larger the file's megapixels, the larger it is. On my Canon 80d, a JPEG is around 6MB, while a RAW file is around 24 MB. RAW files contain much more data and detail in the image and are not compressed, which is why the file size is so much larger, and you should be shooting in RAW.
Take a few photos with your camera and see how large they are. Now, multiply that value by the number of photos you expect to take, giving you a guide for the card capacity.
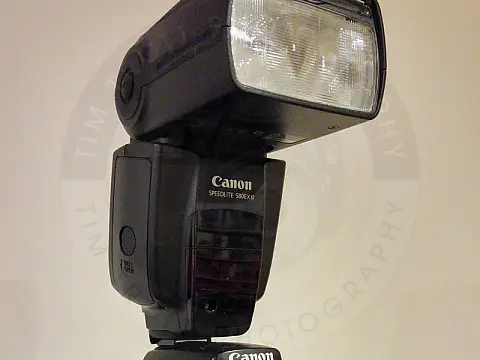
Using the Right Flash Settings
Correct flash usage can make or break a photo. Flash is a great way to add drama to your images and add a pop to them. It can fill in harsh shadows, illuminate your subject or make them stand out.
In automatic modes, the built-in flash will automatically pop up and trigger when the camera thinks it is needed. This isn't always the best. I've had my camera on auto, outdoors in the sun, photographing a landscape, and the camera decides that the flash is needed. Other times, when I want the flash, the camera thinks I don't. If you shoot in automatic mode and the flash keeps popping up when unnecessary, there is usually an automatic mode without flash. Sometimes, this is indicated by a flash crossed out. If the flash doesn't pop up, you can manually press a button to release it. The flash should then fire when you take a photo.
Always use red-eye reduction when photographing people or animals with the flash.
Shooting in a manual is best when using a hot shoe flash. By bouncing the flash, you will get the best results in the shortest amount of time. This is where you bounce your flash off a large surface, such as the ceiling or a large wall. White walls work best as darker walls will tend to swallow your flash power and also have the potential to create a colour cast on your image.
The settings below should be used as a rough starting point, although you may need to adjust them slightly according to your scene.
- Aperture - Set this to around f/8.
- Shutter Speed - Set to 1/200. On most cameras, this is the fastest you can go with flash.
- ISO - Use the lowest ISO to reduce noise as much as possible. ISO 100-200 is ideal.
- Flash power - Set the flash power to 1/16. You should refer to your flash manual for the procedure on this.
Take a test shot, and you can easily adjust the exposure based on the results from that first image.
Always have spare batteries and spares for your spares. Flash drains batteries FAST. Start with lower flash power and increase it if necessary. This will increase battery life and flash recycle time (the time the flash takes to recharge before it will fire again).
Take Advantage of Custom Shooting Modes
A Custom mode is a camera setting that allows the photographer to instantly recall a saved camera setup configuration by simply turning the top dial. These are typically C1, C2 and C3.
Configuring a "C" mode is very easy. Adjust all of your camera settings as desired for the "C" mode being programmed, and then find and select the "Custom shooting mode" menu option located in the "Tools" tab. Next, select "Register settings". If more than one "C" mode is available on your camera, the desired mode number must be selected.
These settings will be restored each time you switch to the C mode on the dial.
Using C modes is very handy if you regularly switch between two different subjects, such as landscapes and action. Using these modes, I can quickly switch from shooting landscapes to shooting interesting birds or wildlife that I may spot and only have a split second to snap.
These settings can be changed after selecting them; for example, select C1, then adjust the shutter speed and ISO. I can switch to C2, then back to C1, and the original C1 settings are restored. If I want to make the new settings permanent, it's just a matter of registering them again.
Below is how I configure my two C modes for two different situations.
C Mode 1 Sports/Action
For action shots, I prefer to use fast shutter speed. I set the camera to shutter priority, the initial speed of 1/800 seconds, ISO to auto, and a wide-open aperture. I have enabled AI Servo autofocus with a large zone AF. I have high-speed burst mode enabled.
C Mode 2 Landscape
For landscape, I set the camera to aperture priority, set the initial aperture to f/11, auto shutter speed and auto ISO. I have single-point centre AF, single-shot autofocus, and single-shot drive.