What is Digital Photography ISO and Grain?We take a look at digital photography ISO, grain and noise to see what they are, their effect on exposure and image quality.
This article is part of a series of articles. Please use the links below to navigate between the articles.
- Introduction to Photography Course - Definition & Types of Photography
- How Cameras Work and Terminology Explained for Beginners
- What is the Exposure Triangle and How Does It Affects Exposure?
- Understanding Camera Shutter Speed for Beginners
- Aperture and Depth of Field in Photography Explained
- What is Digital Photography ISO and Grain?
- How to Understand Camera Lenses and Focal Length
- Essential Photography Composition Rules To Improve Your Photos
- Camera Metering Modes Demystified - Which One To Use
- Camera Shooting and Exposure Modes Explained
- Complete Guide to Flash Photography for Beginners
- The Importance of Using Tripods in Photography
- What Are White Balance And Colour Temperature Camera Settings?
- How to Use Camera Histograms in Photography for Perfect Exposure
- Master These 10 Camera Settings For Your Best Photographs
- Why You Should Be Shooting in RAW - Reasons and Benefits Explained
- Essential Photo Editing Techniques to Enhance Photographs
- Complete Guide to Macro Photography for Beginners
- Beginners Landscape Photography Guide for Stunning Photos

Digital photography ISO is a crucial setting that impacts image brightness and graininess. Understanding ISO helps you manage light sensitivity and achieve the desired photo quality. Learn how to balance ISO to capture clearer and more detailed images.
What is Digital Photography ISO?
ISO is an international standard for measuring the speed or sensitivity of negative film colour. In digital cameras, it is an equivalent measure of computed amplification of a digital signal. As with its film counterpart, digital ISO increases the sensitivity to light at the expense of quality. High ISO film suffers from graininess, while digital ISO suffers from noise during amplification. The higher the ISO setting, the more the light is amplified, and the more noise is introduced. The more noise, the lower the image quality.
A camera setting of ISO 100 is the same as ISO 100 film, so photos taken using the same shutter speed and aperture with the same ISO will have the same exposure in digital and film. ISO 200 is twice as sensitive as ISO 100.
How to Change ISO Camera Setting
Most, if not all, cameras have a manually adjustable ISO setting and an automatic setting. Most of the time, the automatic setting will handle the exposure quite well and only increase the ISO when it feels it cannot get the correct exposure with shutter speed and aperture alone. When shooting in shutter priority, the camera can make the aperture as wide as possible, but if this won't let in enough light, it has to increase ISO.
You can manually set the ISO setting, and there is usually an ISO button or menu item. However, this will vary depending on the camera's make and model. For Canon DSLR, there is a button labelled ISO, which, when pressed, allows the scroll wheel to adjust the ISO from Auto to any of the available settings.

You can also find ISO settings within the camera menus. On Canon models, you can select the automatic ISO range - the camera will automatically pick an ISO within that range and can be very useful if you want to have an automatic ISO in the 100-800 range to control noise.
Most DSLR cameras also have a high-iso noise-reduction mode, which will help control noise on the higher ISO settings at the cost of speed - it can double the time taken to save a photo.
Using ISO in Low Light
When working in low light, you will eventually find yourself using the widest possible aperture and the slowest shutter speed you can to stop action. At this point, your only choice is to increase the ISO to get a balanced exposure; however, as a general rule, you should always use the lowest ISO possible. That way, you can achieve the cleanest images with the best dynamic range and colour depth.
If there is not enough light and your pictures are blurry because the shutter speed isn't fast enough, and you're already using the widest possible aperture, the only thing left to do is increase the ISO. You could leave this on Auto, but I don't, as my camera always seems to choose a higher ISO than it needs. Don't forget to put it back down after you're done.

Example Digital Photography ISO Values
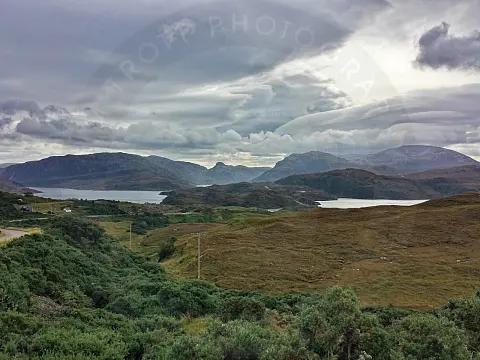
Target ISO values for the outdoors will range from ISO 100-400 outdoors to ISO 400-3200 indoors. Please note that these values will vary slightly depending on the ambient light in the situation and your camera.
Here are a few examples of ISO values as a guideline; however, you should always seek to use the lowest ISO value possible.
- ISO 100 (or less) - Best for shooting well-lit subjects on bright, sunny days.
- ISO 400 - When lighting is still good but not the brightest, such as on cloudy days or in well-lit rooms.
- ISO 800 - For general indoor photography, without a flash or additional lighting support.
- ISO 1600 - For shooting indoors when dark, evenings or nighttime. If there is any movement involved, then you'll need to have a fast shutter speed as well.
Digital Photography ISO Tips
Learning the best ISO settings and your camera's limits can be invaluable. Try setting the camera to program mode, take some shots at different ISO settings, and see how the camera adjusts aperture and shutter speed. Examine the photos throughout the ISO range to see the acceptable noise limit. I don't use anything above ISO 1600 unless necessary. On my camera, ISO 12800 is pretty useless.
Using the lowest possible ISO value is a general rule, and as with all rules, there are exceptions. Sometimes, setting a very high ISO value can create a gritty photographic style or can be used to replicate old photographs. There are also times when you want to close the aperture down to increase sharpness - e.g. a landscape, and increasing the ISO will recover the exposure.
Astrophotography uses high ISO values to capture as much light as possible. Individual exposures are stacked on each other to improve the signal-to-noise ratio and reduce, or even eliminate, noise in the resulting photo.